ppluspharmacy
Stripe Webhooks

General
Stripe Webhooks are actions that can be set up in Stripe through the Developers settings, so that when a specific event occurs (e.g., order payment), the corresponding command for issuing an invoice set up in Workadu is executed.
Requirements
To activate Stripe Webhooks, you will need the following:
-
a Workadu account - sign up for Free here
- a Stripe account
- integration codes with AADE MyData - See the instructions here
- Integration and an active billing plan with a provider (not required for testing) - Contact support through the Chat System at the bottom right of our platform’s interface
Integration implementation
1. In your Stripe account, go to
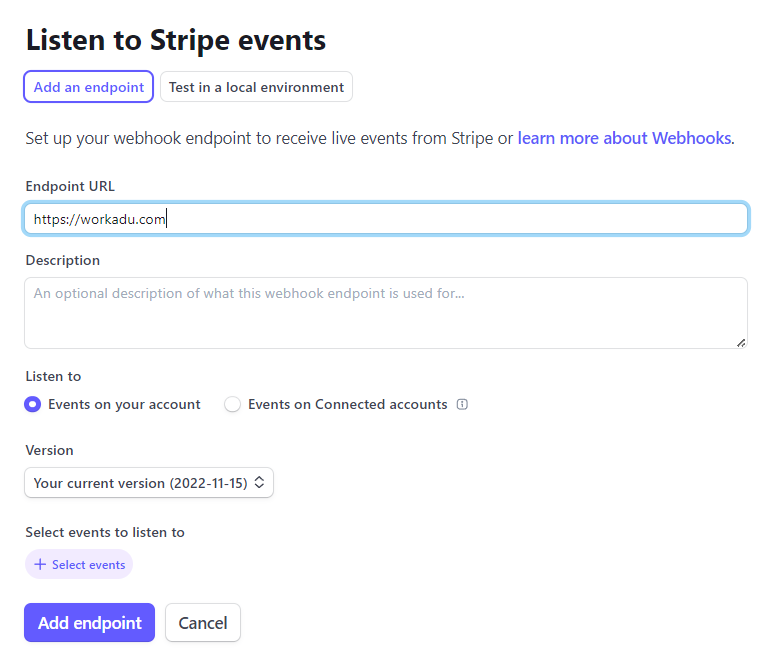
- From the Stripe admin panel, select the Developers section. It can be found in the Top Right or Bottom Left, depending on the status of your account.
- Next, go to the Webhooks section. You will sometimes find it with the name Event Destinations and sometimes below the category Workbench, it also depends on your account status.
- Click the + Add endpoint / destination button.
- In the Endpoint URL field, temporarily write "https://workadu.com".
-
Click +Select events, select the Payment Intent category, and then click "payment_intent.succeeded"
-
Next, click Add Events and then Add Endpoint.

2. From the list of saved Webhooks titled "Hosted endpoints", click on the webhook and then click the "Reveal" button under "Signing secret" and copy the string that appears.

3. Then, go to the Workadu app. Click the three dots in the middle-left of the screen where "More" is located, then select "Connections". Scroll down until you find Stripe Webhooks and click "Connect".
4. In the connection interface, you’ll see four fields that need to be filled out.
- The field "Environment" accepts values "live" or "sandbox".
- In the "Stripe signed hashed code" field, paste the string you copied from Stripe in Step 2.
- For the "Stripe Api Secret key" field, go to Stripe’s admin panel under Developers, then to the API keys section. There, create and copy an API secret key as shown below, and paste it into the corresponding field in Workadu.
- The "Stripe Connected account id" field is for the id of your Stripe connected account, if applicable; otherwise, leave it blank.
- Once you’ve completed the fields, click "Save and Connect".
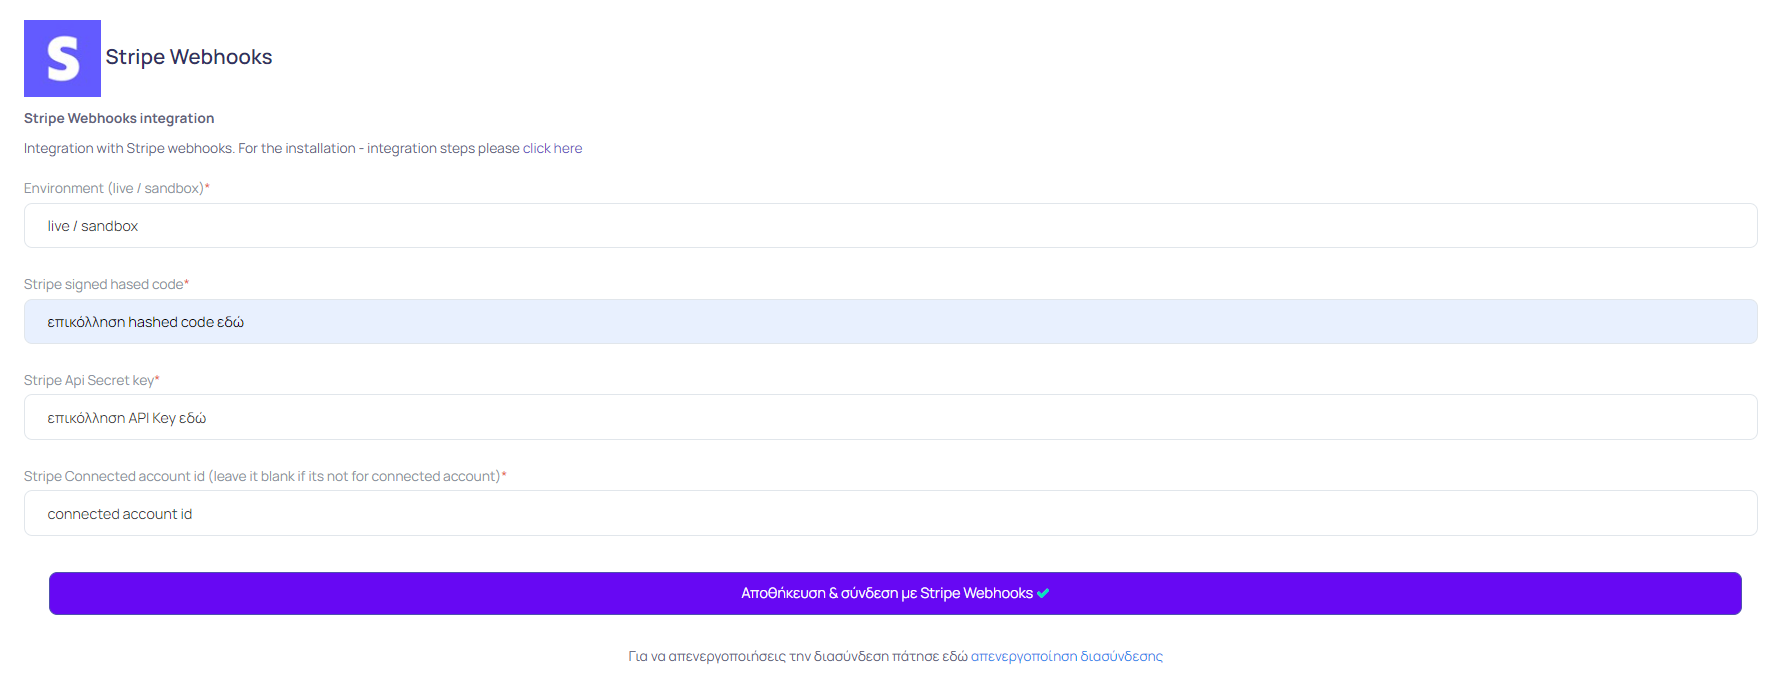

- The "Environment" field refers to the status of your app / website. You can connect to Stripe in either a Live or Test (sandbox) mode.
- The Signed hashed code and API key come from your Stripe webhook and API credentials.
Go live
After completing the above steps, and ensuring that the transmission of documents is correct, through sending the "test," you should proceed via our support for connection with the AADE MyData. In the case of connecting with an electronic invoicing provider, additional steps will be required. Below you will find the procedure after activating the webhooks so that certification can be performed by our technical consultant.
- Activation of subscription plan in Workadu
- Completion of the process for issuing documents through a provider (Retail Receipts). See instructions here
- Issue a test order in the eshop. Log in to Workadu and check the issued document.
- Request support (9:00-17:00) via the chat system within Workadu